Vacuum Stress in Pets: Calm Training Steps for Dogs & Cats
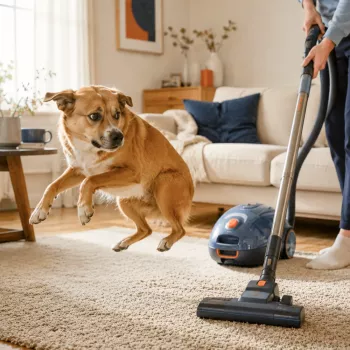
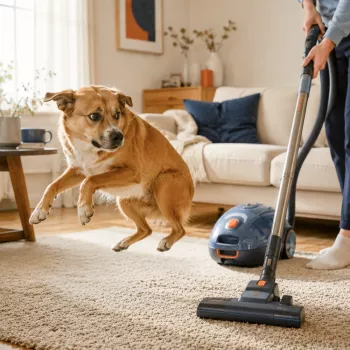
Helping Pets Handle Vacuum Stress: A Calm, Step-by-Step Plan for Dogs and Cats
Many pets react to vacuums with panic, barking, hiding, or swatting because the noise, vibration, and movement feel unpredictable. The goal isn’t to “power through” the fear—it’s to replace dread with a predictable routine that includes distance, choice, and rewards. With gradual exposure, a safe setup, and a consistent plan, most dogs and cats can learn to cope much better with cleaning days.
Why vacuums feel scary to pets
Vacuum stress is usually a mix of sound sensitivity and “weird moving object” alarm.
- Noise sensitivity: High-volume, high-frequency sound can overwhelm sound-sensitive dogs and many cats.
- Unpredictable movement: A fast object that changes direction can trigger chasing, guarding, or flight responses.
- Vibration and airflow: Floor rumble and sudden gusts feel threatening at close range.
- Past experiences: One intense startle can condition a strong fear response the next time the vacuum appears.
- Species differences: Cats often choose avoidance (hiding), while dogs may vocalize, lunge, or try to control the “intruder.”
For more context on noise fears and fear behavior, see guidance from the American Veterinary Medical Association (AVMA) and the ASPCA.
Signs of vacuum stress to watch for
Stress isn’t always loud. The most useful rule: if the pet can’t relax or can’t take treats, the step is too hard.
- Dogs: barking, lunging, pacing, trembling, panting, drooling, pinned ears, tucked tail, refusal of treats, attempts to herd or bite the vacuum.
- Cats: hiding, dilated pupils, crouching, flattened ears, tail flicking, swatting, hissing, bolting, loss of appetite, litter box avoidance after stressful sessions.
- Escalation cues: inability to take treats, frantic escape attempts, stiff posture, or prolonged recovery after the vacuum stops—signals to slow down the plan.
If your cat’s stress shows up as prolonged hiding or disrupted routines, practical feline stress support can be found via International Cat Care.
Set up the environment for success
Before training, make vacuum time safer and more predictable so your pet has real options besides panic.
- Create a refuge zone: Use a quiet room with a closed door, water, bed, and familiar scent items. For cats, add a covered hide and vertical space if available.
- Prevent chasing and cornering: Use baby gates or closed doors. For dogs, a leash/long line can help only if it doesn’t add stress.
- Reduce intensity: Vacuum when your pet is naturally calmer (after exercise and a bathroom break for dogs; after a meal or play for cats).
- Sound buffering: Run a fan, white noise, or calm music in the refuge zone to soften the vacuum sound.
- Prep rewards: Reserve high-value treats or a lickable food toy used only during training sessions.
A gradual training plan (desensitization + positive association)
This approach works best when the pet controls distance and the vacuum predicts something good. Keep sessions short, end on a calm note, and repeat the easiest steps more than you think you need.
Step 1 — Vacuum is harmless (off)
Place the vacuum in view at a distance. Reward calm looks, sniffing from afar, or relaxed body language. End before stress spikes.
Step 2 — Approach and retreat (off)
Let your pet choose how close to get. Reward voluntary investigation. Never drag a pet toward the vacuum.
Step 3 — Add sound at low intensity
Turn the vacuum on in another room for 1–2 seconds, then off. Reward immediately. Repeat until your pet stays loose-bodied and can eat.
Step 4 — Increase duration
Build from seconds to minutes while maintaining calm behavior. Keep sessions predictable and brief, especially early on.
Step 5 — Add movement
Vacuum a small area far away, then stop. Reward calm. Over days or weeks, gradually reduce distance as long as your pet recovers quickly.
Step 6 — Generalize
Progress tracker for vacuum training
| Stage | Vacuum status | Distance | Session length | Calm criteria |
|---|---|---|---|---|
| 1 | Off | Across the room | 2–5 minutes | Relaxed posture, takes treats |
| 2 | Off | Pet chooses distance | 2–5 minutes | Approaches/looks without freezing |
| 3 | On (brief) | Different room | 1–10 seconds | Eats treats, no frantic escape |
| 4 | On | Same room (far) | 30–120 seconds | Loose body, minimal startle |
| 5 | On + movement | Far corner/doorway | 1–5 minutes | Recovers quickly if startled |
| 6 | On + normal cleaning | Varies | Full routine | Uses coping skills, can settle |
Calming aids and practical tools
If you want a structured routine with checklists, progress notes, and troubleshooting prompts, Helping Pets Handle Vacuum Stress can be paired with the steps above to keep training consistent from week to week.
To stay consistent with short sessions and measurable progress, a simple planner can help. The Goal-Setting Guide for Real Results – Printable Goal Planner is an easy way to schedule training minutes, note distances, and track what “calm” looks like for your individual pet.
Common mistakes that slow progress
Safety notes and when to get professional help
FAQ
How long does it take for a pet to get used to the vacuum?
Some pets improve in a few days, but many need a few weeks of consistent, low-pressure practice. The timeline depends on fear intensity, how much distance control the pet has, and whether you only move forward when your pet stays relaxed and takes treats.
Should a pet be kept in another room while vacuuming?
A refuge room is often the fastest way to reduce stress during real cleaning, especially early on. It can also be part of training by pairing that space with comfort, white noise, and special treats while you gradually work through desensitization in separate sessions.
What if a dog tries to attack the vacuum or a cat panics and hides for hours?
Stop the session, increase distance immediately, and use barriers so your pet can’t rehearse chasing or feel trapped. Restart at an easier step (often “vacuum off at a distance”), and consult a veterinarian or qualified behavior professional if intense reactions continue or worsen.







Leave a comment